

2021 Mar 22
A Test Run of Adobe’s ‘Super Resolution’
I went out this weekend to try the new feature recently added to Adobe Camera Raw, and can report some pretty mind-boggling results. I won’t attempt to repeat here what others have already said, but will refer you to this article for a thorough technical explanation of what’s actually going on.
In a nutshell, Super Resolution is an enhancement that uses machine learning to increase the resolution of an image. When you open a raw file in ACR, you control-click (Mac) on an image to find ‘Enhance...’. In the dialog that opens you’ll see a Super Resolution checkbox; click that and tell it to GO. What you get after some considerable grinding is a new .dng file with twice the linear dimensions of your original .CR3 (Canon users). A 6720 x 4800p images becomes 13440 x 8960p. The original 23.5 MB file grows to 469 MB! There’s some translation between file formats going on that I can’t explain; in a direct upscaling I’d expect a 94 MB file. I’ve got my camera set to use Canon’s compressed C-RAW, but still; that’s a phenomenal swelling. And this gigantic new file isn’t just bigger—the new pixels added are ones that would be there if you’d been using a camera with a super resolution sensor, roughly speaking. My cameras have a 30.4 MP sensor. The super-resolved would be produced by a 122 MP sensor—if my logic is correct. Again, mind boggling.
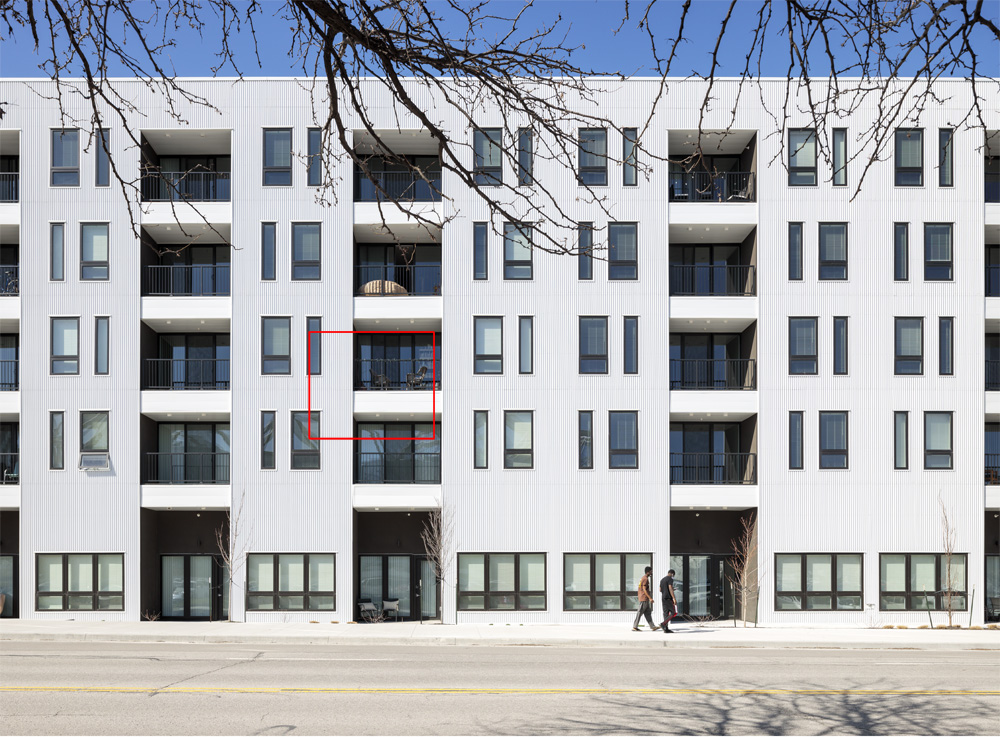
So for a real-world example, I found a building with lots of detail—representative of what I encounter all the time in architectural photography. This one has ribbed metal siding, metal guardrails, window blinds, and if you look closely: wicker furniture. The un-cropped photo posted here is not full size—even saved as a JPG it’s a 56 MB file. I include it as a way-finder for my cropped views.
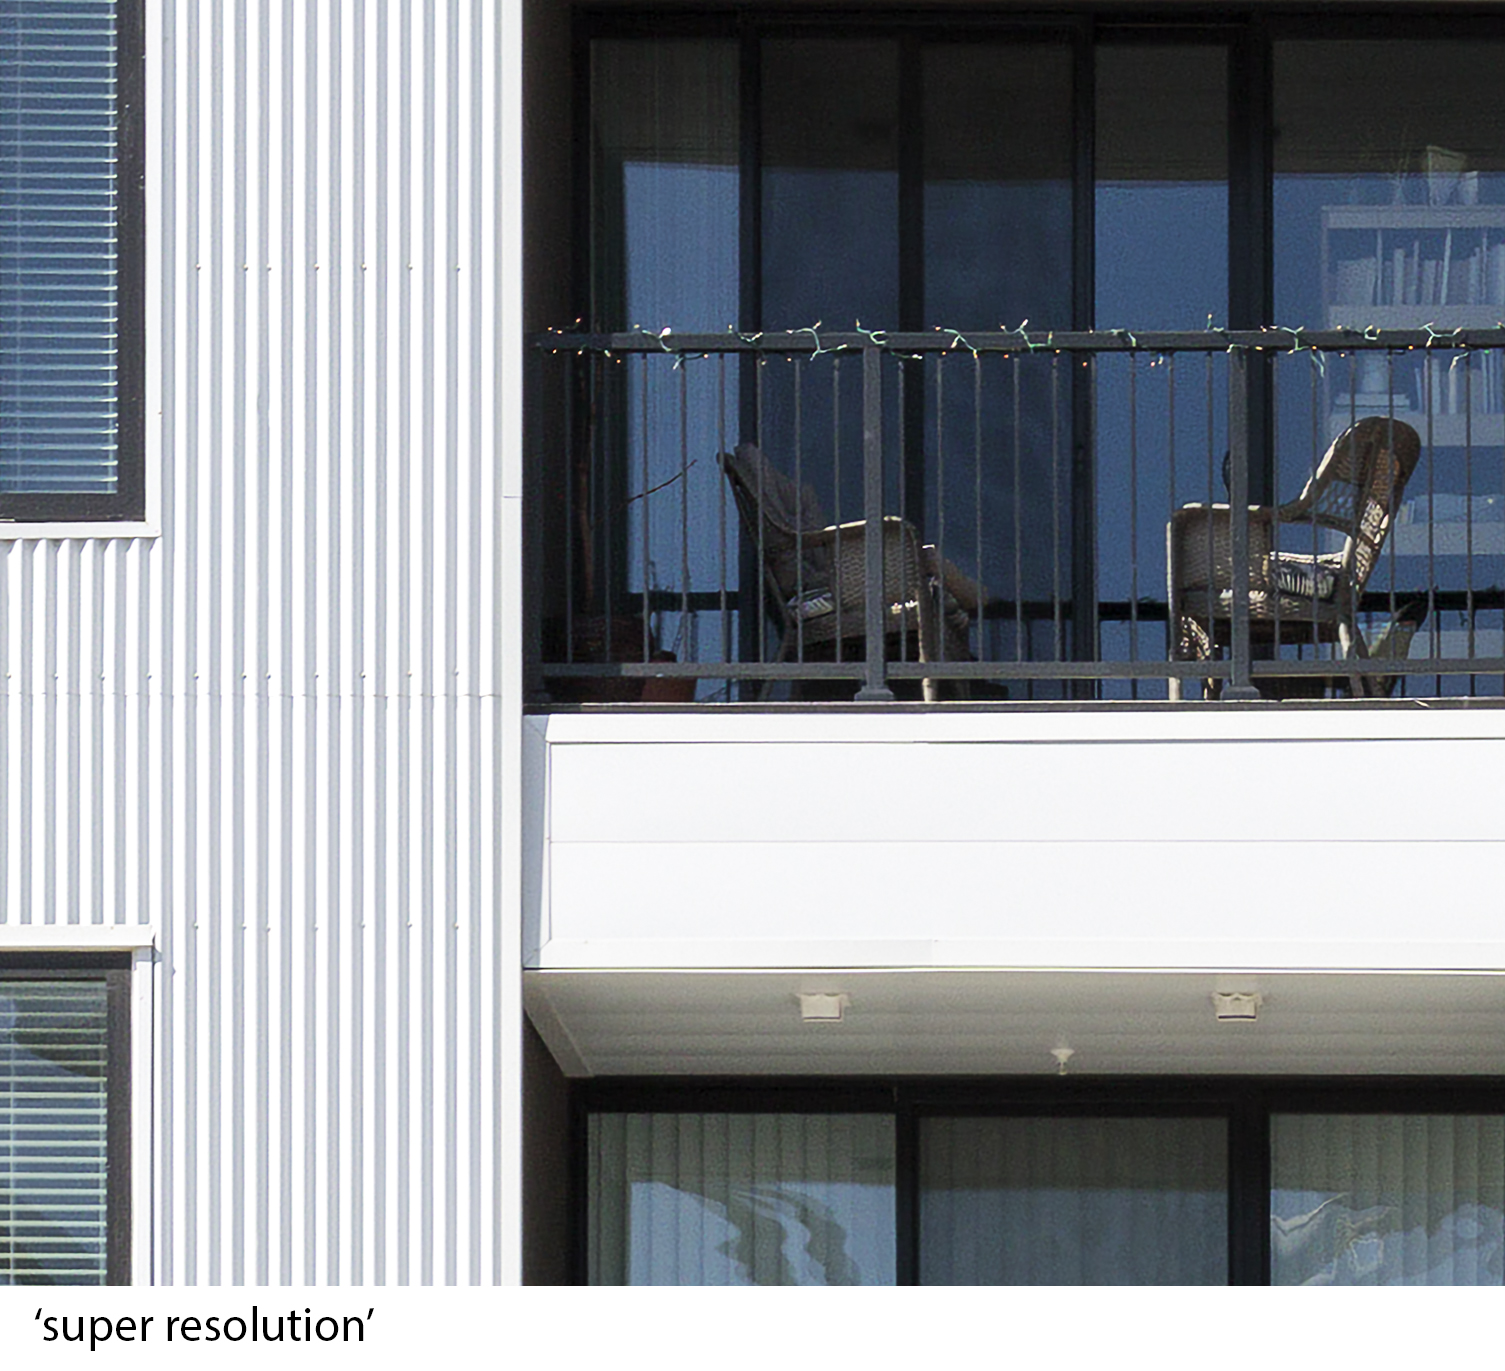
Processed traditionally at 360 ppi the photo measures 16.7” x 12.3”, ‘enhanced’ it’s 33.5” x 24.6”!
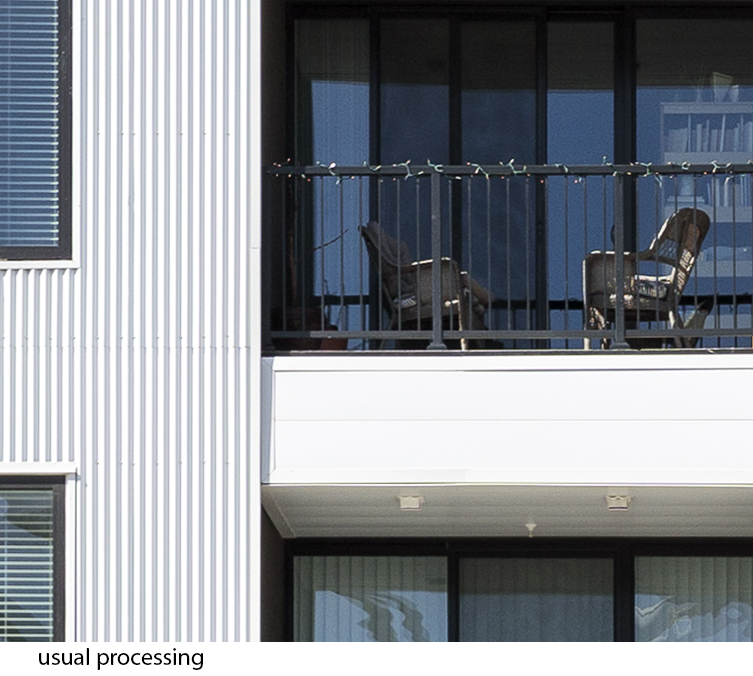
In this comparison of crops, both examples are left at their full scale. Look at the row of rivets in the metal siding, and the wicker furniture especially. In the un-enhanced, you know that’s it’s wicker, but in the ‘enhanced’ you can actually see that it is. At the very left edge, in the upper window you can clearly see there is a string running vertically in the blind—in the un-enhanced that string is barely visible!

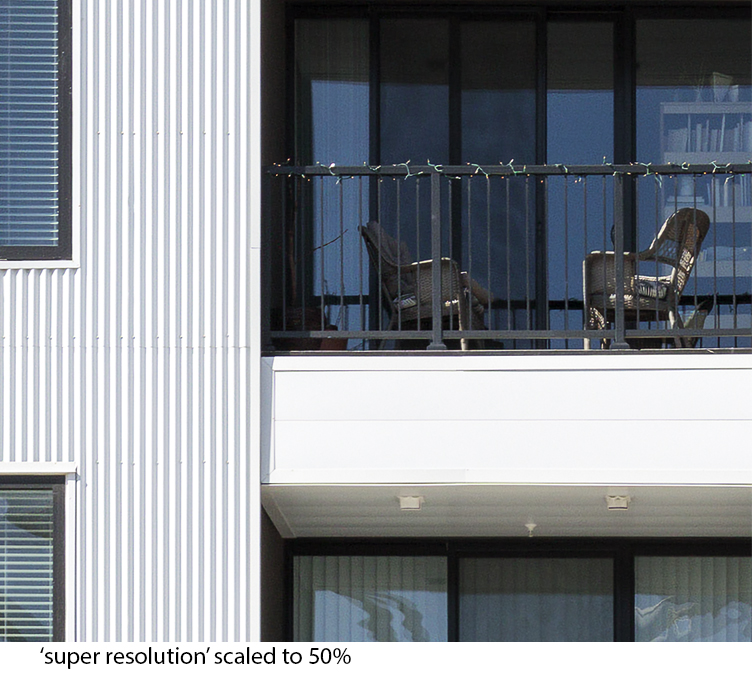
In these, I scaled the ‘enhanced’ to the same size as the un-enhanced. No sophisticated algorythms applied, I just used the Edit>Transform>Scale tool, 50%. Even when the two crops are ‘size-matched’ there is much better detail in the super resolution-ed image. Look at the string of Christmas lights.
Finally I should note, Super Resolution is not sharpening, per se. Sharpening in Photoshop looks at edges in an image and increases the contrast between adjacent pixels, or that’s my understanding anyway. If you overdo it, you end up with artifacts of the process, or ‘halos’. Super Resolution on the other hand, is machine learning applied. A computer was ‘taught’ to see how to fill in between pixels by ‘showing’ it millions of images in low res and higher res versions.
And I didn’t think to check what I was doing with sharpening until after I’d already completed my experiments but there is little bit applied during RAW conversion, prior to ‘enhancement’: 40 on the Sharpening slider, 25 on the Color Noise Reduction. I need to try it again without. Adobe reccomends using as ‘clean’ a source file as possible.
How this will be incorporated into my workflow is another endeavor entirely. I have typically shot two exposures and spliced the images together into a sort of vertical panorama—that’s how I would have done this example to get the 3:4 ratio I often prefer over the camera’s default 2:3. That yields me greater resolution than the camera’s native 30.4 MP but at the cost of some pretty hefty tedium in editing. My first trials with ‘enhancement’ were on some images I’ve already got, and they made for some monsterous files that Photoshop refused to even think about—they bumped hard into the app’s 2 GB maximum file size. My poor old Mac Pro coughed and sputtered more than a little. Instead, these new captures were visuallized as complete photos, and captured in one exposure instead of two. And still they’re really big, detailed photos! Far bigger than my old cut-and-paste process made.
Then there’s that new 45 MP camera arriving soon.
A