

Pixel-Shift Resolution
Canon came out this week with their version of a pixel-shift feature that—in a nutshell—automatically makes multiple exposures while moving the sensor around in between each, and then stacking them together into a single high resolution file. Sounds good—instead of a 45 MP sensor, now you’ve got 400 MP! But I am skeptical. So I went out to get some images to experiment on.


In the image above I made four versions, testing three different resolution enhancing techniques. All were created without resizing the image produced, though the jpegs here are all resized to be an equal 1000 px high. I’m sure there are ways to manipulate sharpness before the resizing, but I didn’t.
The versions are:
RAW images processed with Canon’s Digital Photo Professional 4, or DPP.
This is a technique that uses multiple manually fired exposures combined in Photoshop. The RAW files are processed just as in A and then converted to .tiff files. Better explained HERE.
Called by Canon: “IBIS High Resolution Shot”. This is Canon’s new feature introduced for their R5 in firmware a update 1.18.1. As I understand it, the camera moves the sensor around to make 9 exposures of a scene with each one shifted a pixel or so. All are combined into a single image file which is huge, pixel-dimension-wise. Canon does a poor job of communicating what this all about, I’ve found nothing more than a brief description in their product page.
This is the thing Adobe came out with some months ago which uses AI to do a ‘sharpening’ in a way that’s not like regular ol’ Smart Sharpen or Unsharp Mask. I did a sort of review of this some months ago, HERE.
The versions are:
A — Standard Processing
RAW images processed with Canon’s Digital Photo Professional 4, or DPP.
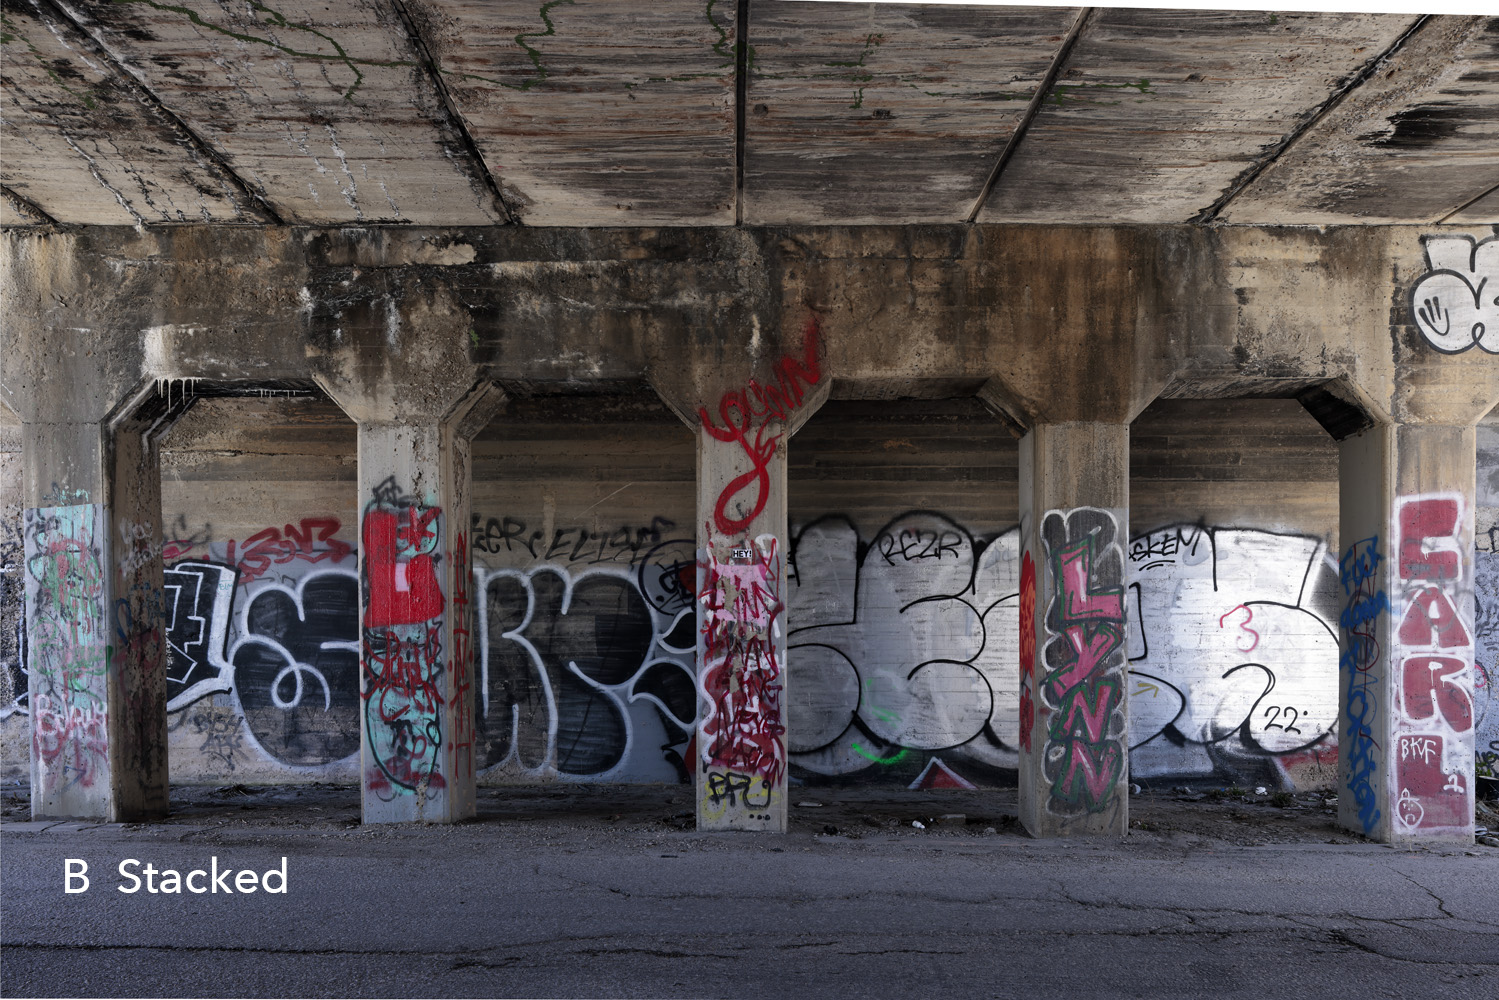
B — Multi-exposures stacked in Photoshop
This is a technique that uses multiple manually fired exposures combined in Photoshop. The RAW files are processed just as in A and then converted to .tiff files. Better explained HERE.
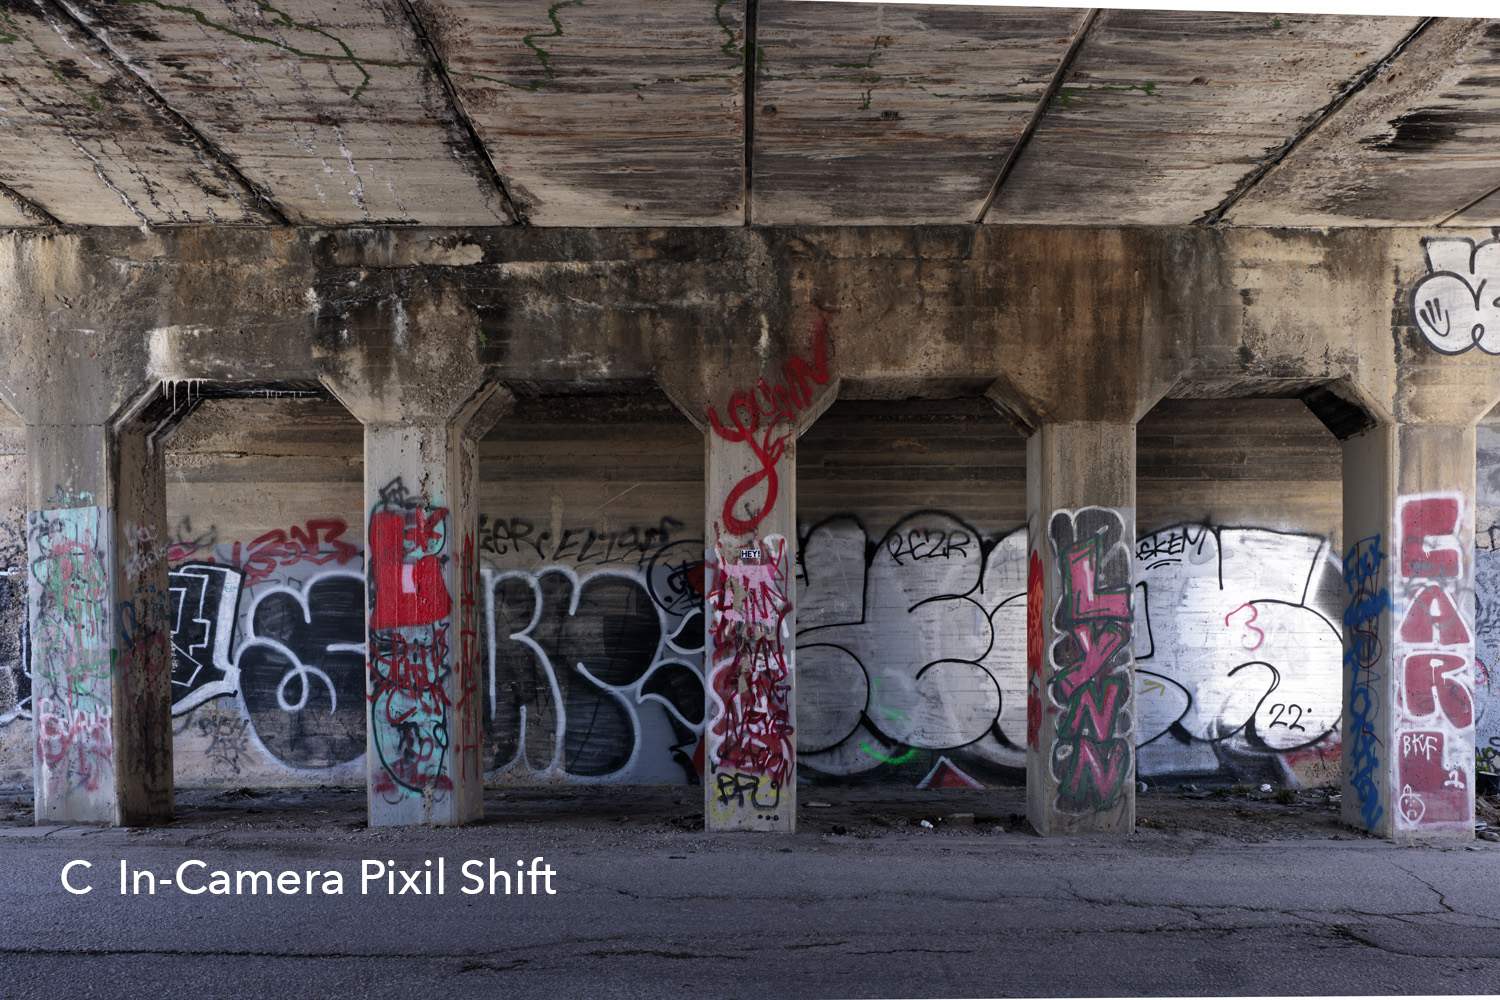
C — Canon’s in-camera pixel shift (yeah, I spelled it wrong in my jpeg)
Called by Canon: “IBIS High Resolution Shot”. This is Canon’s new feature introduced for their R5 in firmware a update 1.18.1. As I understand it, the camera moves the sensor around to make 9 exposures of a scene with each one shifted a pixel or so. All are combined into a single image file which is huge, pixel-dimension-wise. Canon does a poor job of communicating what this all about, I’ve found nothing more than a brief description in their product page.
D — RAW file processed with Adobe Raw using their Super Resolution ‘Enhancement’
This is the thing Adobe came out with some months ago which uses AI to do a ‘sharpening’ in a way that’s not like regular ol’ Smart Sharpen or Unsharp Mask. I did a sort of review of this some months ago, HERE.
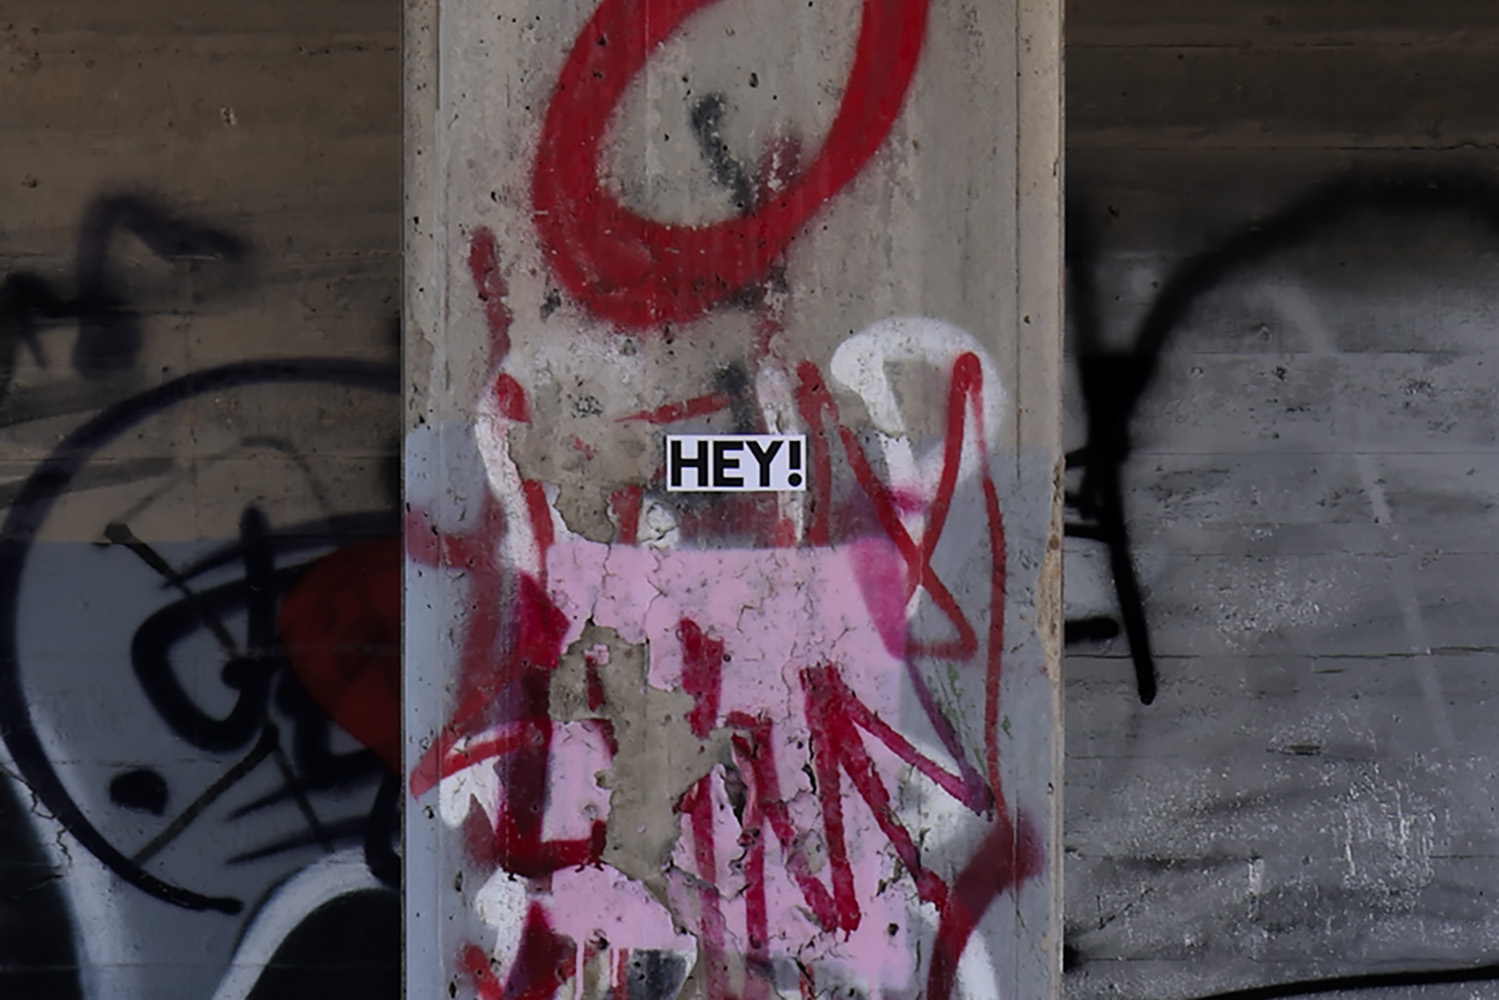
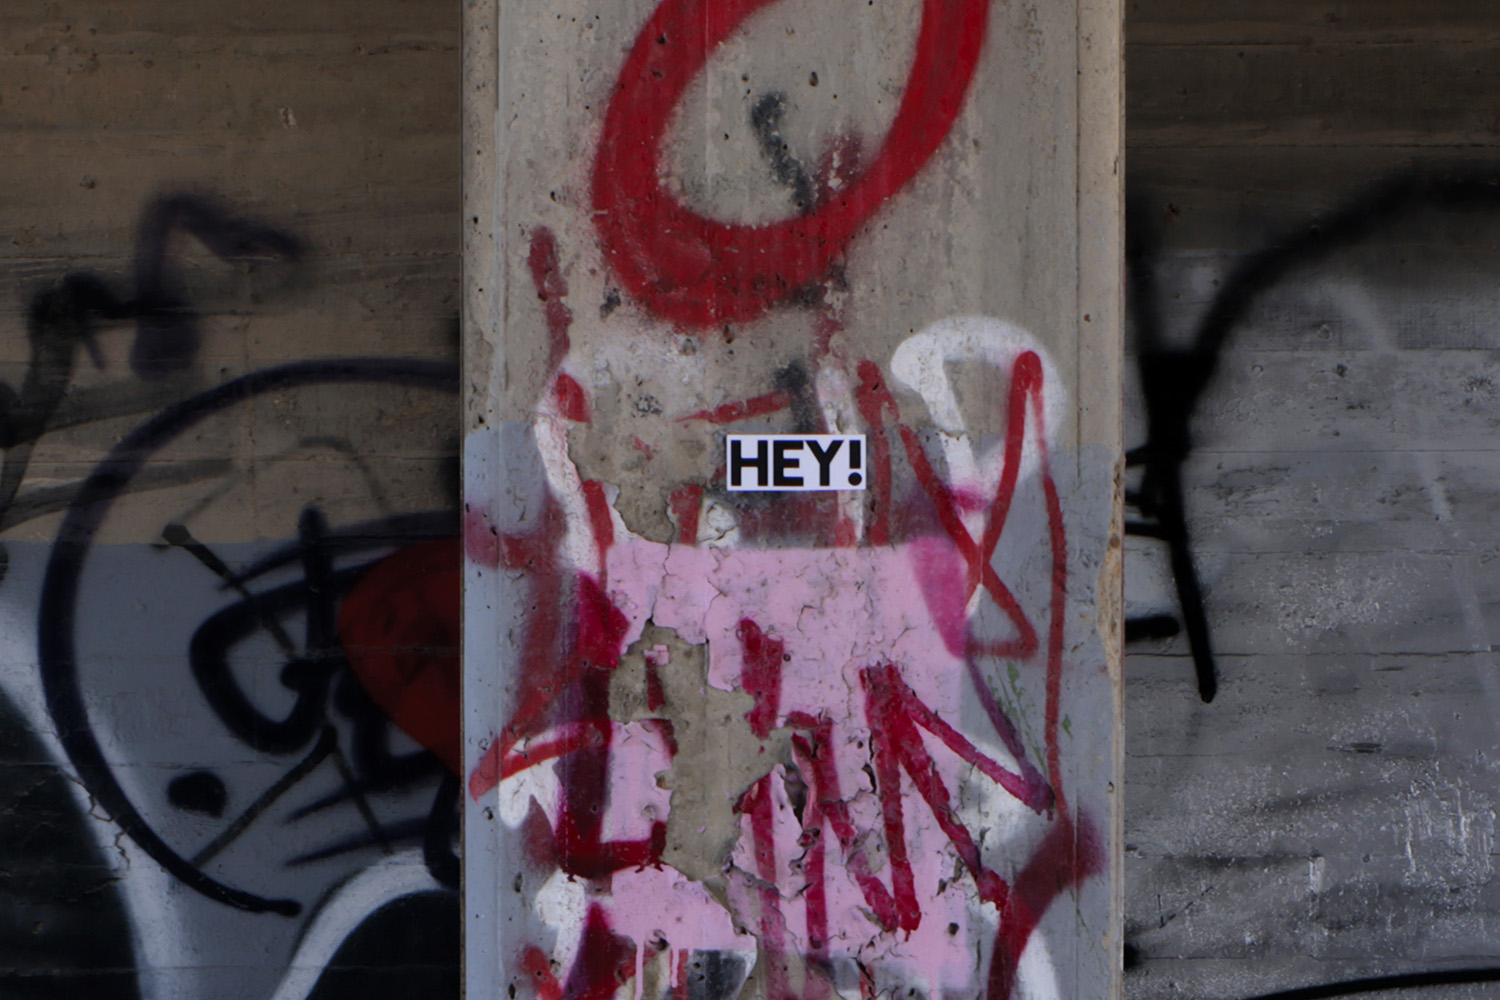
The detail insets above are from the center of the full photo. My general impression after fooling with this all day: meh.
In particular:
In particular:


A — Standard Processing
Un-cropped image size: 8197 x 5468 px. Native resolution from the camera. This is my standard approach to virtually all photos.
I experiment with different Raw processing apps as they come out or are updated, only to return again and again to Canon’s own DPP. It’s interface is a little kludgy, but its results are wonderful. It produces tiff files that have a three-dimensionality that I don’t see with say, Adobe Raw, or Capture One, or DxO Photolab.
B — Multi-exposures stacked in Photoshop
Same un-cropped image size: 8197 x 5468 px.
RAW files are converted as in the stand process above and the resulting tiff’s loaded into PS for stacking and combining. This article explains it better than I can. Basically the idea is that you’ve got 12 (in this case) chances to get pixels that are NOT obsured by digital noise. So this is not so much a reolution improvement as a ‘color depth’ improvement.
Honestly, I don’t see a difference from version A.
C — Canon’s in-camera pixel shift
Un-cropped image size: 24,576 x 16,384 px. This is huge and I’m sure there’s a way to sharpen it at full size before reduceing to match my standard Version A, but I didn’t do that.
Called by Canon; “IBIS High Resolution Shot”, this is Canon’s new feature introduced for the R5 in firmware update 1.18.1. As I understand it, the camera moves the sensor around to make 9 exposures of a scene with each one shifted a pixel or so. All are combined into a single image file in-camera, which is huge pixel-dimension-wise. Canon does a poor job of communicating what this all about, and I’ve found nothing more than a brief description in their product page, though I didn’t did especially deep.
I’m not sure what’s the gain exactly. On my screen it looks less sharp when looking at a similar sized portion of the image—on-screen, as I say. Write me if you know what I can do to get a sharper, comperable size image.
And another down side of this approach is that I’m forced to accept a jpeg, and lose all RAW adjustability, especially the Digital Lens Optimizer and distortion correction you get in DPP...
D — RAW file processed with Adobe Raw using their Super Resolution ‘Enhancement’
Un-cropped image size: 16,384 x 10,928 px.
I’ve seen some excellent results using this, but it really does depend on the image: what sorts of detail you have, or what pattern of textures. It varies, which itself is disconcerting when a set of images need to stand together as a package. In this case the rough surfaces are renered pretty crunchy. So I’d have to reject these out of hand--never mind that I’m also forces to use Adobe’ RAW conversion. But again, it’s a big pixel-dimention file, so there’s probably something I could be doing with it.
And there you have it. Likely not much use to anyone, but it serves to answer; “What the hell have you been doing all day?” when my wife asks. There is some value in know now that what I’ve been doing all along isn’t improved by alot of additional work. Not discernably, anyway.
Thank you to the hard core nut-jobs that have read all the way to the end!
A